Can I help you find something??

Showing posts with label Sewing. Show all posts

14 May 2014

Baby Taggie Giraffe

meg-made baby taggie giraffe

My friend Saraid is nearing the end of her pregnancy and I am nesting right along with her! 

I'd love nothing more than to be in Brisbane with her as she prepares for this hugely exciting time, choosing crib-beddng, painting the nursery and rubbing her beautiful big belly (as all pregnant ladies love). 

But, as I am in London, with a well feathered (and at-capacity nest), I am helping to feather Saraid's nest instead!!

I made this little sweet guy a few months ago and sent it along with the bunting that I made for her nursery. 


24 January 2014

Gold glitter elbow pads DIY

I get told far too often that I shouldn't wear my heart on my sleeve, but in this case, I disagree!

meg-made: Gold glitter heart elbow pads

meg-made: Gold glitter heart elbow pads
Are these Valentine's Day Elbow Pads? Well they might be for you, but they were just Sunday Elbow Pads for me!

My husband and I don't celebrate Valentines Day, it's just not our thing (plus, it falls between my birthday and our anniversary, so we have lots to celebrate already). But, I realised when I made these Gold Glitter Elbow pads a few weeks ago, that potentially I was being subconsciously affected by Valentines Day without even knowing it (darn it Pinterest). 

I love gold, I love glitter, I love hearts! I just love these elbow pads so much!!!! They were so easy and quick to make, and totally transformed my otherwise boring blue jumper!

Instructions

meg-made: Gold glitter heart elbow pads DIY
meg-made: Gold glitter heart elbow pads
1. Gather materials - you will need a some glitter fabric, tracing paper, pencil, needle & thread and a cardigan/jumper (sweater)

2. Trace out two hearts on the tracing paper (I trace over a picture on my iPad) and then trace onto the  fabric glitter

3. Cut the two hearts out and place each heart on each sleeve and try it on to make sure they are placed properly. 

4. Hand sew the heart onto the sleeve with the same colour cotton as the jumper(sweater)

5. Admire! (Ha, and realise there is NO flattering way to pose for a shot of your elbows!!!!)

meg-made: Gold glitter heart elbow pads
I may not set aside February 14th as a particular day to celebrates my Loves, but I am the luckiest Wife, Mother, Aunty, Sister, GodMother, Aunty-in-waiting, Daughter and Friend, and I'm not afraid to show it!

meg-made: Gold glitter heart elbow pads
post signature

Psst!! If you are looking for a little more meg-made, I'd LOVE for you to follow along!


please-follow-me-on-pinterest please-follow-me-on-facebook please-follow-me-on-instagram

17 January 2014

Baby Clothes Patchwork Quilt

A patchwork of little memories! 

We are definitely getting to that stage of things that we're nostalgic about days with our little baby, as our little independently minded toddler starts taking over (seriously, yesterday she chose her own coat and shoes, she's only 18 months old for goodness sake!!!). But, this post is about another little girl who I've been nostalgically reflecting about, my niece Lahna. When we were visiting them in Jersey a few months ago my sister-in-law offered up 6 boxes of old clothes that they are donating to charity and wanted to know if I wanted anything for Maddie first. I've always thought about making a Baby Clothes Patchwork Quilt, and now I had some materials!! I made sure they had kept the super special pieces and went along with my pile of clothes in the ruse of taking a second wardrobe for Madeleine.

I will make one for my own  daughter one day too, but I will say, cutting into Lahna's clothes felt a little bit like cutting into old memories. But then, when I saw the finished product I knew it was worth it, and now they can keep all of those memories in one tidy, comfy (and cozy) place!

There are presumably millions of Patchwork Quilt tutorials out there, so I won't rehash those, but I just wanted to share the finished product with you! 

meg-made: Baby Clothes Patchwork Quilt

When I was making each piece I was reminiscing about when she used to wear that particular item.  Most of these clothes were from when she was around 1 year old, which was when we had left Australia and got to start spending so much time with her. Each of the squares brought back such happy memories for Aunty Meg!!! 

meg-made: Baby Clothes Patchwork Quilt

For example, there were her first big girl pi's...


And the super bright T-shirt that we went and picked flowers in while touring Orgueil Castle in Jersey...


And the purple trousers she wore one day when we were all holidaying in Italy together, when she crawled around Verona....


I loved making little patches from pockets and frills, and hope it is something she (or her mama) will hold onto for some time.  

meg-made: Baby Clothes Patchwork Quilt


Wishing you a wonderful weekend, hooray for Fridays!!

post signature


Psst!! If you are looking for a little more meg-made, I'd LOVE for you to follow along! 


please-follow-me-on-pinterest please-follow-me-on-facebook please-follow-me-on-instagram

03 July 2013

Favourite Book Bunting

I love bunting. But lets be honest, who doesn't! Its so cute and can be so personal, and such a sweet way to fill up a large white space. 

Our nieces and nephew in sunny North Queensland are moving to the sunny Sunshine Coast (still in Queensland) and so I set to work to come up with a little housewarming presents for the kids' new rooms. I will post the girls' soon, but I wanted to share what I came up with for our the little boy. 

He is the epitome of a boys boy (at the grand old age of 4) and loves planes, trains and automobiles. I have no idea what his room is going to be like, so I didn't want to send anything too big or bulky, and so thought bunting may work, but worried that I only knew how to make girly bunting!! I thought that it would be so cool to paint a picture of a train on each bunting flag, but really, I am a terrible artist, so kept thinking. I realised that what I was actually picturing, was a Thomas the Tank Engine bunting. So that's exactly what I did. 

I went and bought a Thomas book that I liked the pictures of and set to work. 


The Thomas books have really neat binding so it was very easy to tear all the pages gently away from the seam without ripping any. I kept them in order, because this way, on the flip side, the story still remains in tact! 


I wanted the pictures to be a little bit more like bunting, but didn't want to lose half the image to create a full triangle, so made a little flag template out of a spare page, and made each page the same shape. 

Next I ironed my ribbon in half so that it would be easier to fold over the pages and sew into place. 


I pinned each one on the ribbon for spacing purposes and then started to sew. 


(I think this little fella is a bit concerned...)


Make loops out of the ribbon at each end so that they can be easily hung, and ta daaaaaaa....


I was really happy with how it turned out and really hope the little guy loves it too!


post signature

18 June 2013

1st Birthday Decorations

To say I had fun decorating Baby M's 1st Birthday party would be an understatement of gargantuan proportions! For weeks leading up to the party, whenever Baby M would take a nap, I would get the glue gun out and get to work!! I was in my element, surrounded by pink and gold glitter!

My "To-Do" list for the party. Mr M knows I love me a list, and so this was just one of many that was on the go!  I just love the satisfaction of ticking things off a list!


I wanted to make the party a black tie cocktail party, but sense ruled out on this one! So, I decided to make everyone accessories to wear to the party. Bow ties for the men, and flowers for the ladies. The young ladies had headbands, so they weren't left out! I hung them all outside our door in the hallway, so everyone came in adorned in pink!


I wanted to have a little photo montage of Baby M over her first year. I am keeping the 12 month photo off my blog out of respect for her, because one day, she'd be super embarassed that her naked little tushie was published online!!! 


I made this wreath at Christmas time, but thought it was perfect for the birthday party. It was made by attaching scraps of pink and white fabric to a wire wreath frame. It did take a little bit of time to make, but I loved it instantly. 


All of the wine glasses had gold ribbon tied to the stems, and pink stripe straws. I know that paper straws aren't exactly a brand new concept, but I bought these ones for her party when she was two months old, so I was determined to still use them.


Confetti filled clear balloons and bunting set the scene. My poor husband had to blow each of these balloons, as I get so dizzy even just blowing one up! We then simply attached a little sticky tape/cello tape to each one and stuck them to the roof. I think it would have stayed a secret had one of our friends not given one a little tug!!!


Gold tipped cutlery


Gold paper plates, each tied with pink striped ribbon. I think it made each plate of food feel more like a present, and who doesn't love edible gifts!


Party bags for all the guests (contents will be in the next blog post), with special ones for the little ones.


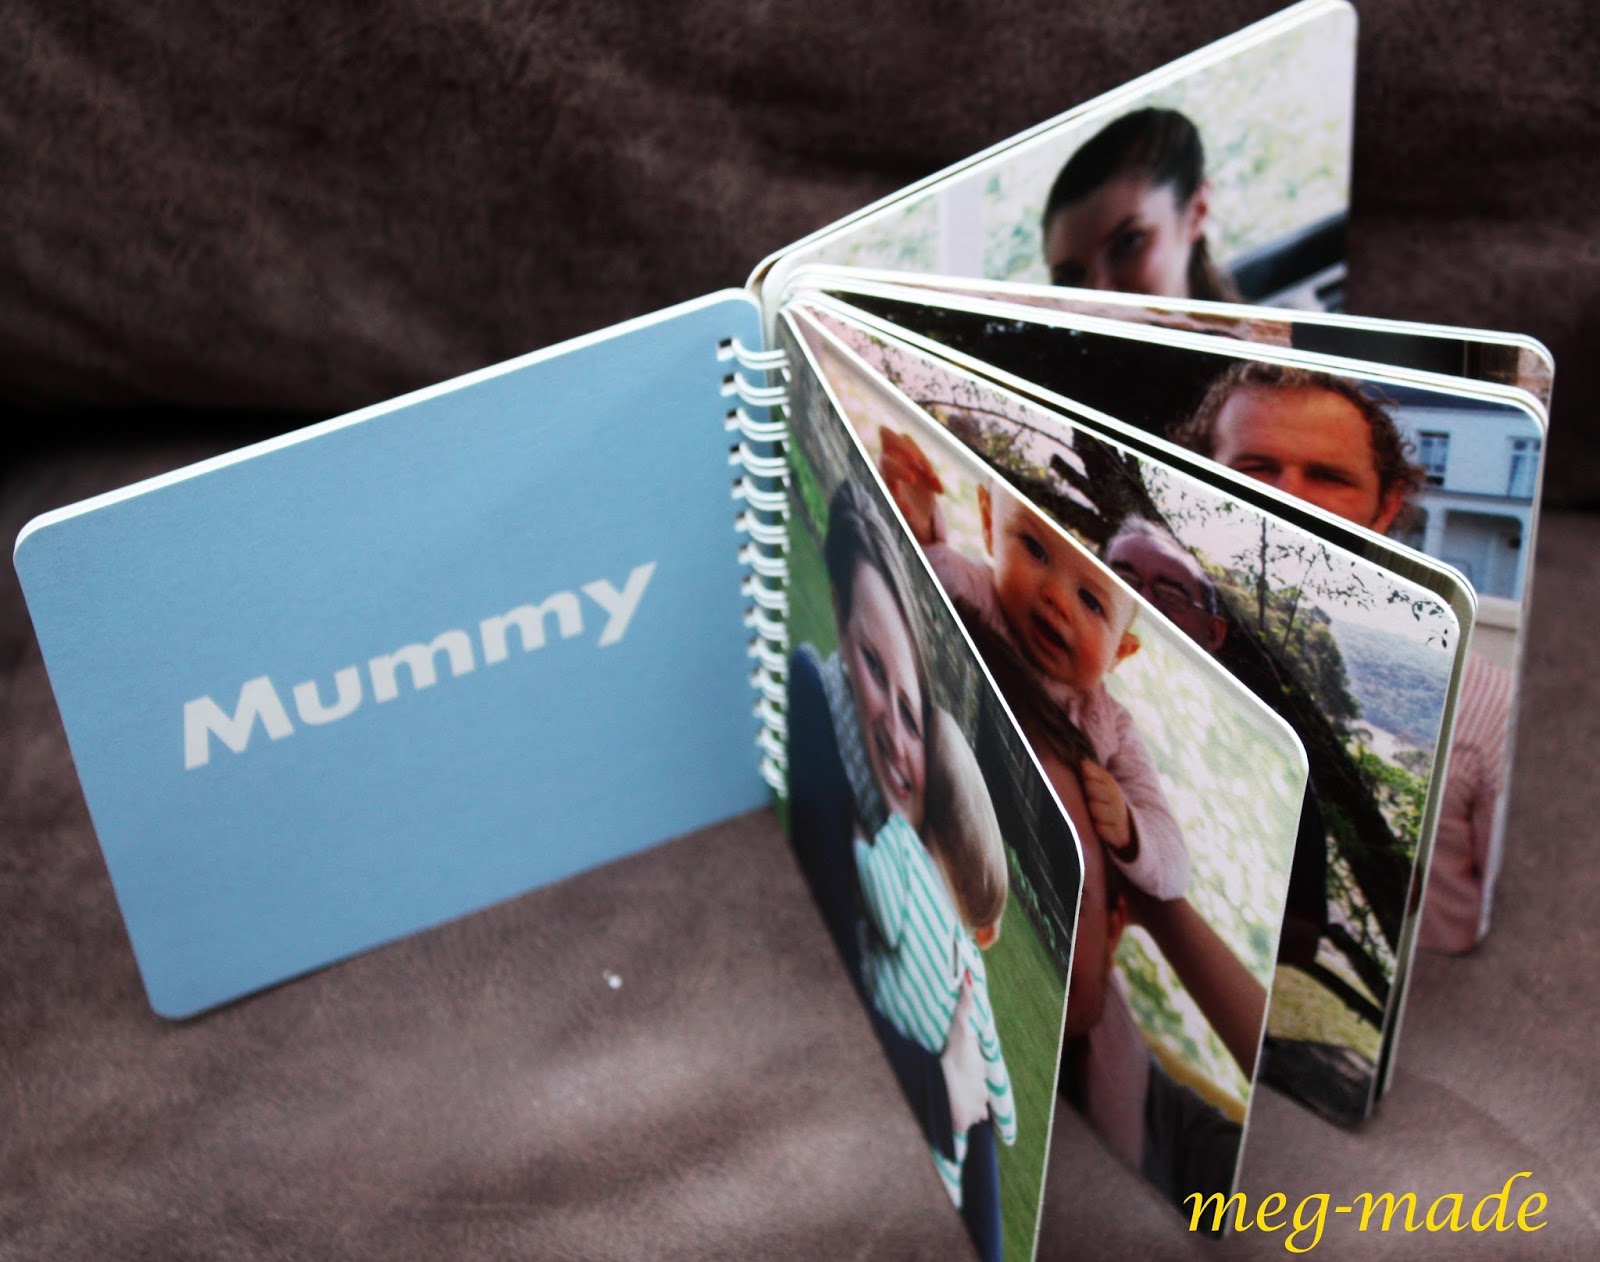
And I have to do a little plug for a present that we ordered for Baby M that I just adore. It is a board book from Pinhole Press that is a book of faces. We made it with all of our family's faces (most photos are of them with Baby M) so that she can get to know everyone even though we are so far away. Already, Baby M just loves this book. It melted my heart to see her crawl over to her bookshelves, pick out this book, crawl back to her sheepskin rug and start turning the pages. I mean, how touching is that, she just wants to see her family!! Or perhaps she just likes looking at herself, but either way, she loves it!


And finally, here is the little card I made for our little 1 year old. I'm thinking of doing the same each year until we can't fit the candles on anymore!! 


I'm not sure if these individual photos really capture the full effect of her party, but it was so much fun making all of these components and then seeing it all come together on the day. I forgot to photograph a few crafty things, but I think you get the gist!

Next post: party food!!

post signature

23 May 2013

Baby Shoes Hanger

Baby shoes are the cutest. Seriously, how cute are these shoes? 

Picked these ones up at Oxfam for 4 quid!! (Yes, fairly sure they are boys!!)

But there's no confusing that these belong to a little girl! I absolutely adore them and wish the sun would shine so she can wear them! They are a new Spanish brand La Coqueta that has just moved in down the road from us and I am pretty sure the staff are going to know Baby M and I very well in no time at all!! 

Isn't there something magical that happens when shoes are shrunk down to baby sizes!!!! It is the result of this line of thinking that means we have a decent collection of tiny shoes around our house, and that is quite literally where they all are...all around our house! It drives me crazy but Baby M loves to play with shoes of all sizes and whilst its easier to find and return our big shoes, her little ones get relocated and lost for days under couches, in the dirty clothes basket or inside other shoes.

Well, having made, used and loved Baby M's book-hanger for the past 12 months, I decided that a smaller version of this would be perfect to store tiny shoes out of the clutches of tiny hands. 

You will need:
Backing fabric- 2 pieces of 90cm x 45cm
Pocket fabric - 8 strips of 25cm x 65cm
Ribbon ties - 1.20m ribbon of your choice
Cotton
Scissors
Coathanger and hook to hang


Here's my e-scetch of how to cut you fabrics and position them:

Instructions:

1. Cut all of your fabric first (I always find measuring and cutting the worst part of any sewing project so like to get it over and done with first). 

2. Pin your pocket pieces together with the right sides facing in, so that you've made 4 strips. 

3. Sew these together and turn inside out and press. You will need to leave a short end open to turn it inside out, and then fold these edges inwards and sew close to the seams. 


4. Do the same for your backing piece, however, you need to sew the ribbons in. I think every single person has at least once in their lives sewn the ribbons the wrong way when doing this, so take an extra moment to pretend turning it inside out and seeing which way your ribbons are going to face. I folded the back piece in half across the top to get the centre point for the middle ribbon, and then estimated either side where the other two should go, based on the coathanger I was going to use. 

You can see all the ribbon rolled up in the inside of these pieces, so that when its turned inside out, they will then be on the outside!


5. When all pieces are sewn you can now start placing them together. 


As my very technical e-scetch shows, the first step is to sew the sides and middle seam of the pockets. 


6. Once this is done, you are to make the pleats on the ends and middle of each pocket, to make a pocket that will fold out a little when shoes are put inside. Otherwise they wouldn't fit much in them. The green lines are supposed to show the pleats!!


7. Sew along the blue dashed lines to secure the pleats in place. Repeat with all four pocket-rows (8 pockets). 


8. Iron the whole thing and attach to a coathanger with the ribbons. 


And then fill with as many adorable pairs of shoes that you can find! Oh wait, here's some....


I was originally going to hang this on the inside of Baby M's wardrobe, but I kind of like it too much and think I want to leave it on the outside for now! Until she grows tall enough to reach the shoes in the bottom pockets, then it will be put away!!!